DIY Rainbow Bauble Christmas Wreath

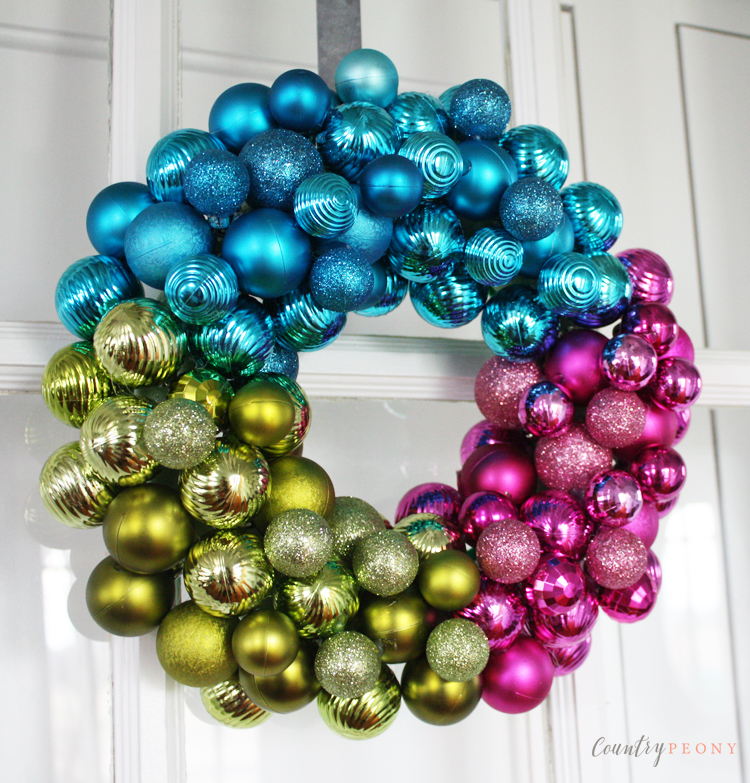
I love a shiny and festive wreath for the Christmas season! I also love saving money on decorations! I am very excited to share today’s wreath with you, because I created a high-end look at a low-end cost. For about $15 you can create this colorful and whimsical wreath as a fun surprise in any area of your Christmas house.
Follow the steps below to make your own rainbow wreath!

*This post contains affiliate links. For more information, please see my disclosure page here.
To make your own rainbow bauble Christmas wreath, you will need:

Step 1: Trace the inside and outside of the foam wreath onto the felt. Then cut the felt out so you have a circle to cover the back of the wreath to finish off your project. Place the felt aside.
*The circle doesn’t have to be perfect as long as it covers the back of the wreath.
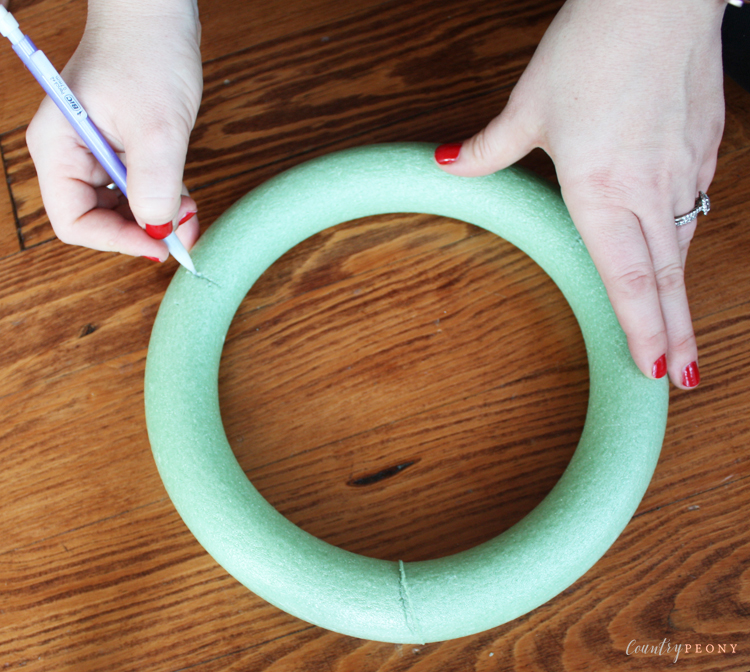
Step 2: Determine how many colors you are using then divide the wreath up. I used three colors so I marked my wreath out into thirds with the pencil so I knew where my colors started and stopped.
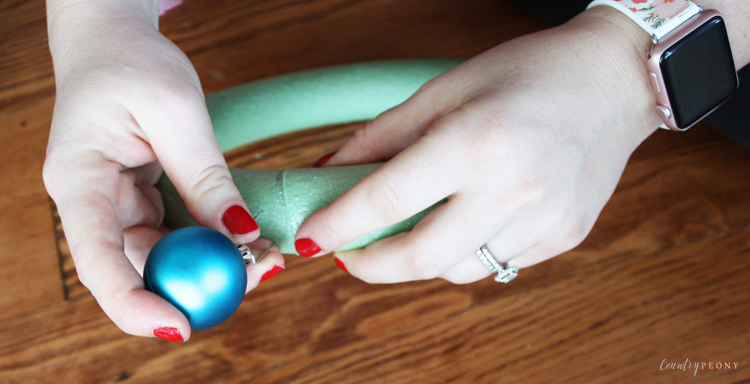
Step 3: Place the greening pin through the top of the bauble. Then insert the greening pin into the foam wreath. Place one bauble at the top, one bauble at the middle, and one inside the wreath (at the bottom).
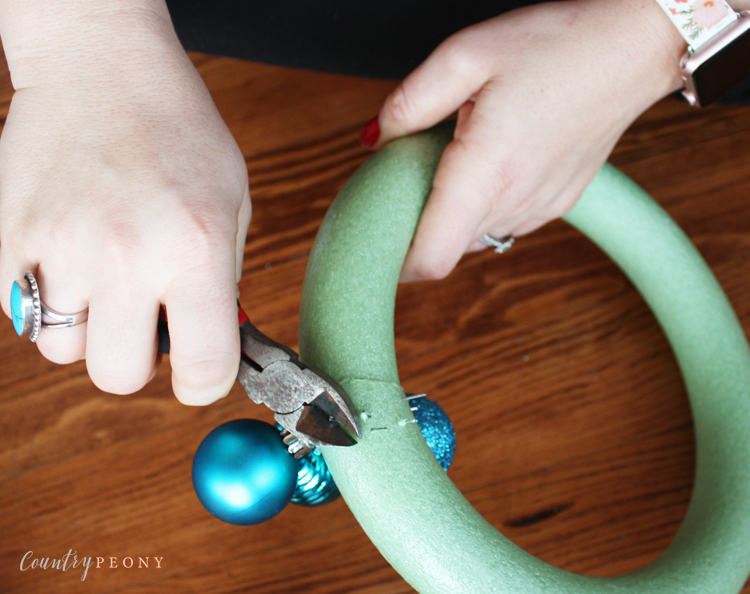
Step 4: If your greening pin went all the way through your foam wreath like mine did, then use the wire cutters to trim off the end of the pin on the backside of the wreath.
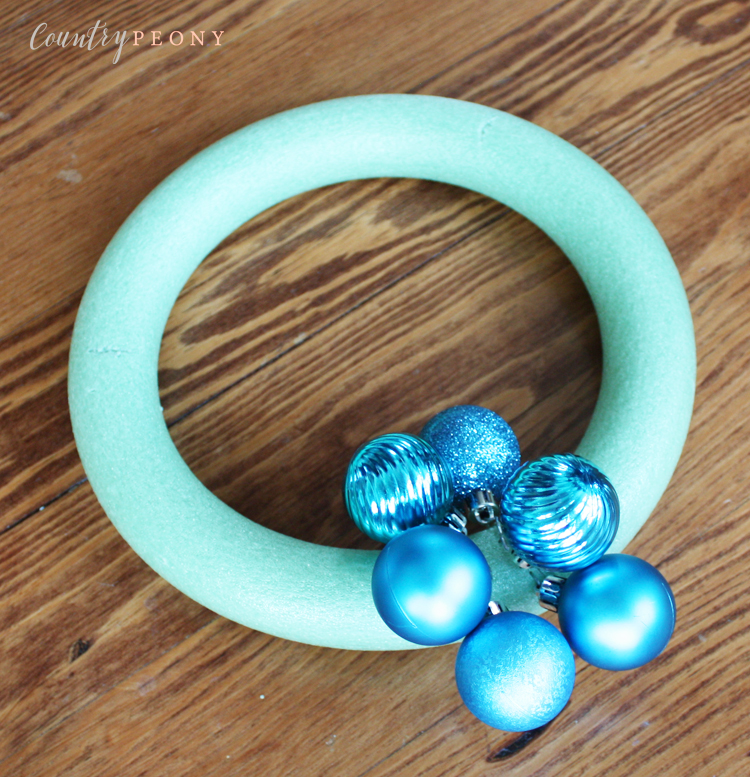
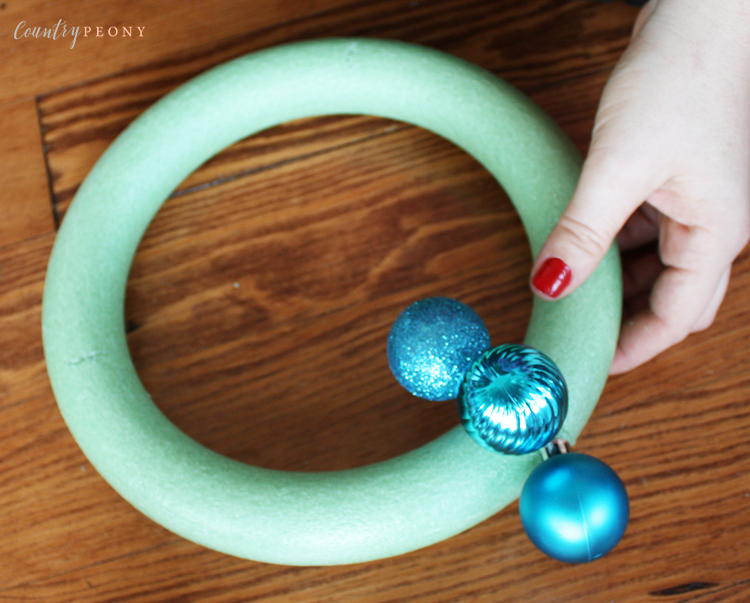
Step 5: Continue to add one bauble to the top, one to the middle, and one to the inside of the wreath until you cover the wreath with colorful baubles. Don’t forget to change colors when you see your mark on the wreath. Also continue to trim the greening pins from the backside of the wreath, if they are poking through.
* Don’t worry about the gaps in the wreath. You will use the smaller baubles to fill in these gaps later on.

Step 6: Once you have added your larger baubles, then hold your wreath up and access where the gaps are and where you need to place the smaller baubles.

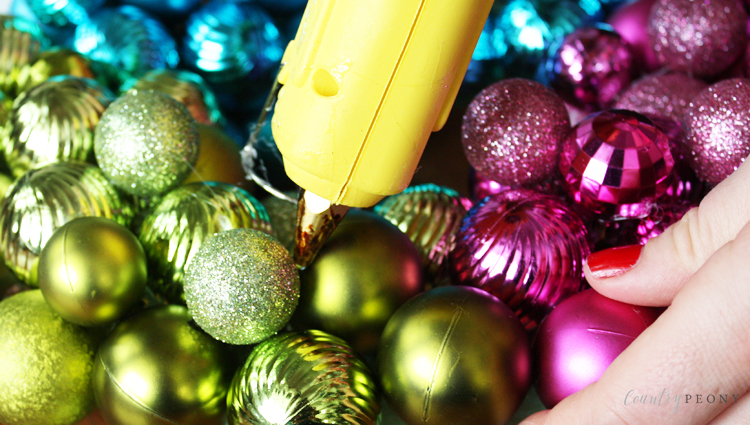
Step 7: Place your hot glue gun on the lowest heat setting, then take your smaller baubles and hot glue them to the tops of the larger baubles where there are holes. Slowly start to add more depth and character to your wreath by using your best judgment, and adding the smaller baubles to the wreath to fill in the gaps.

Step 8: Once you add all of the baubles to your wreath, you will need to create the hanging attachment. Insert a chenille pipe cleaner into the back of the wreath. Then hot glue the back of the pipe cleaner and press it into the wreath.
*You can skip this step if you plan to use your wreath as a tabletop centerpiece.

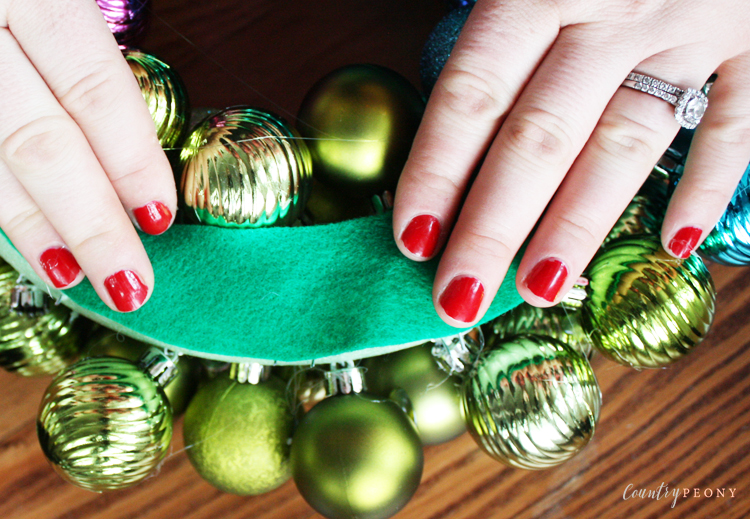
Step 9: Take the felt from step 1, and hot glue it to the back of the wreath.

Step 10: Display your finished wreath! And enjoy your beautiful and festive creation! Happy crafting!!!