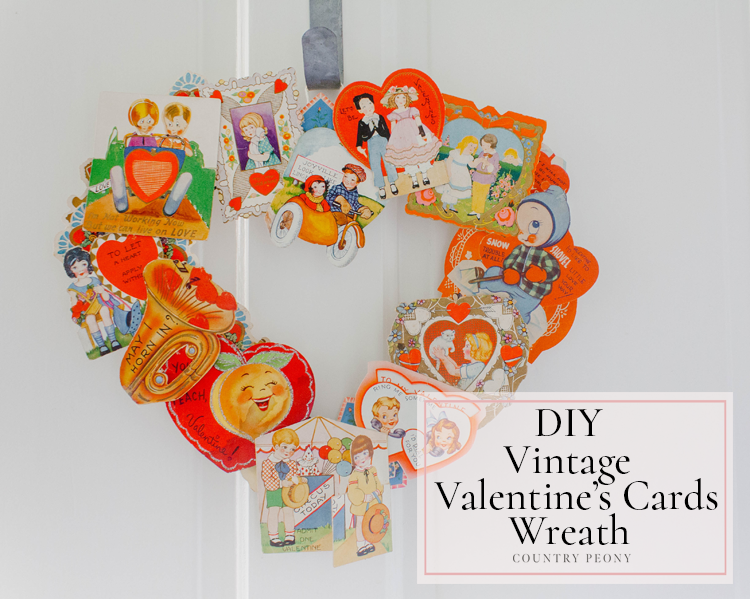
DIY Vintage Valentine's Card Wreath
There is something so precious about Valentine’s Day. I am a very sentimental person, and so Valentine’s Day has always been a fun one for me. As a child I loved making Valentine’s for my friends, and last year I created some fun Valentine Cards for my children to present to their friends.
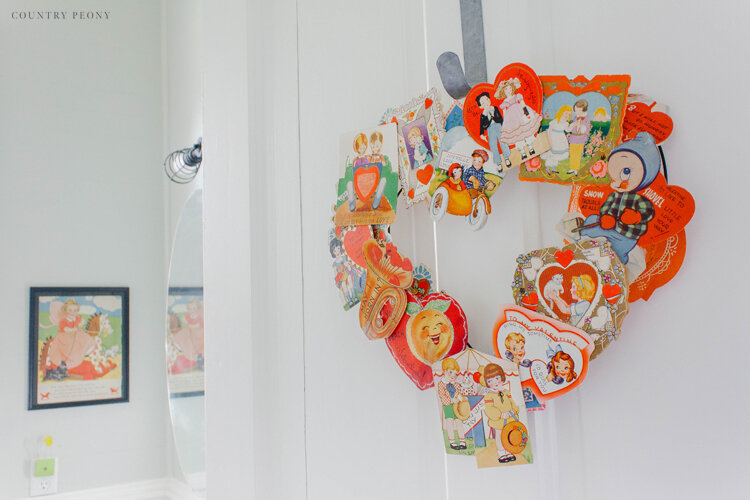
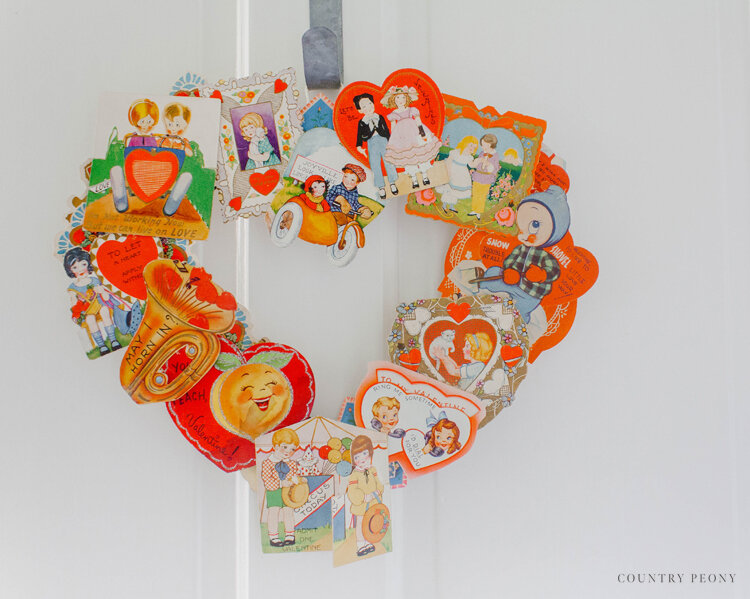
My favorite kind of Valentine’s cards are ones with a story. I love seeking out vintage stationery, and vintage Valentine’s cards are probably my favorite. I adore the sweet notes, and the sentimentality of these vintage cards with the stories they tell. Today I hope to bring those stories to life by turning vintage Valentine’s cards into a DIY wreath.
Last year at the Spring Antique Show in Round Top, Texas I found these adorable, vintage Valentine’s cards. Once I scored a $1 heart wreath from Dollar Tree, I knew these cards would make the prettiest display for Valentine’s Day. This project is so wonderful because it is inexpensive, and very simple to create. It can also be customized to whatever sentimental cards you have in your home. Whether they are recipe cards from your mother or grandmother, Christmas cards from ones you love, or old cards from your childhood or from your children. I also love looking for vintage children’s books when I go thrifting, because their pictures from the book pages can be added to any wreath after you add some cardstock to the back of them. The possibilities are endless!
Want another way to use Vintage Inspired Valentine’s? Here is a tutorial for Vintage Inspired Valentine’s Day Garland from an episode Coffee & Crafting!
I hope you enjoy following along for the step-by-step tutorial to turn vintage Valentine’s cards into a DIY Valentine’s wreath!

*This post contains affiliate links. For more information, please see my disclosure page here.
To make your own DIY Vintage Valentine’s Card Wreath you will need:

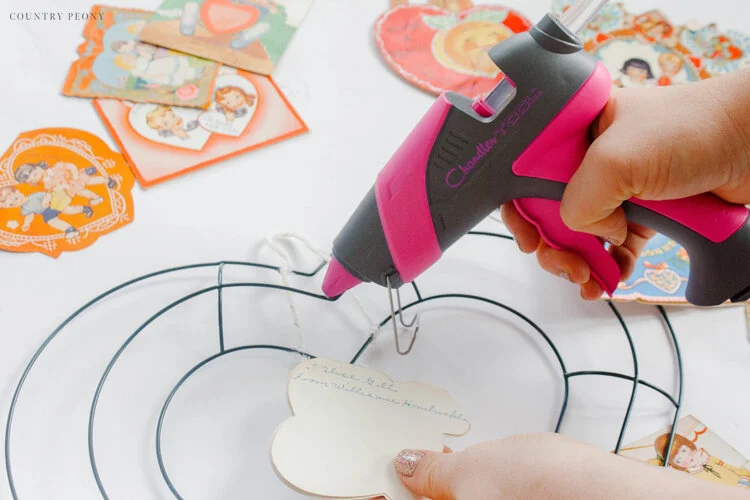
Step 1: Create the hanger. You can use yarn or a ribbon. Measure the size of the yarn loop to ensure it fits over the wreath hanger or knob that you plan to put the wreath on. Tie the ribbon or yarn to the top and back part of the heart-shaped wreath. Then hot glue the yarn in place to ensure it is secure.
Step 2: Add your cards to the wreath. Lay out your Valentine’s cards to see what colors, sizes, and shapes you have. Then start to lay out a rough pattern for your wreath varying the sizes, shapes, and colors. Once you are happy with your layout you can start to secure the cards to the heart-shaped wreath form with hot glue.

Once you add your card to the wreath with hot glue, hold it in place until the glue dries so the card adheres properly.
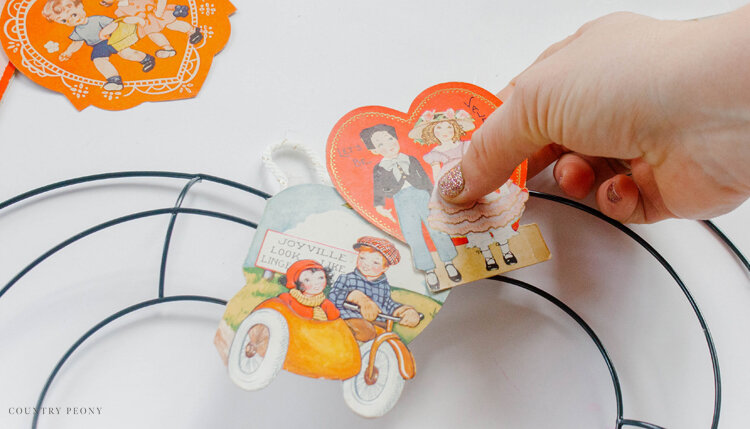
Step 3: Continue to add cards to the heart-shaped wreath with hot glue. Overlap and underlap the cards to create a nice dimension. Keep the movement and integrity of the heart shape in mind as you add the cards.
*Don’t worry about the gaps in between the cards, we will take care of that in a moment.

To ensure stability, hot glue the cards together when appropriate.
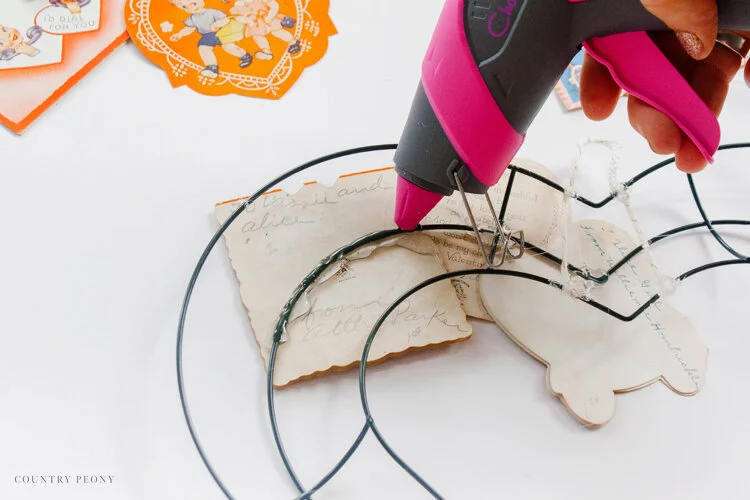
*Since the wreath form wire is thin I found it helpful to add glue to the back as well to ensure the cards stayed in place .

*It may be helpful to cut some of the cards so they fit better on the wreath.

Step 4: Once you add all of your cards and fill up the majority of your heart-shaped wreath, it is time to fill in the gaps.
Choose leftover cards that have beautiful edges (or scrap paper) and trim them to fit in the gaps.
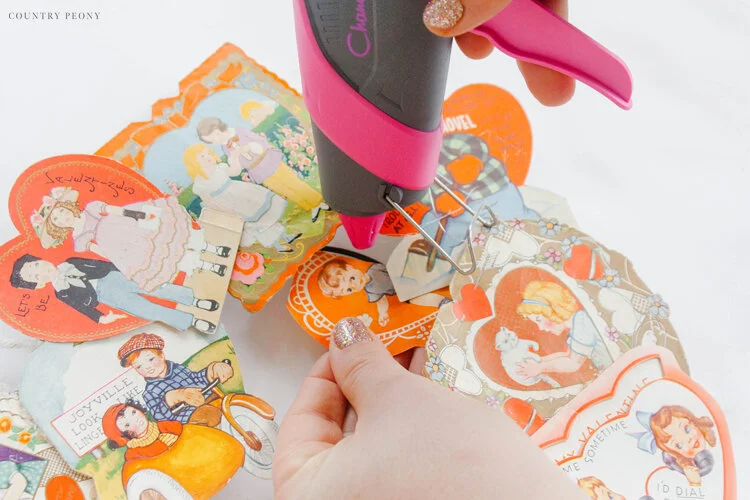
Hot glue the trimmed cards behind the main cards. Continue to add cards where there are gaps.
Then, enjoy your beautiful, custom creation!

Mine currently sits on my vintage baker’s cabinet in our kitchen. I think it is such a sweet compliment to our kitchen.
I hope this inspires you to make your own vintage card wreath. I would love to see them!