DIY Floral Easter Eggs

*This post contains affiliate links. For more information, please see my disclosures here.
Now that Spring has happily sprung, I am very excited to embrace the beautiful weather, plan outdoor activities, and get ready for Easter with fun crafts for myself and my children.
I have been working on my very humble herb and vegetable garden, and experimenting with new flowers for my flower beds this year. Thankfully, my children are loving the fresh Texas Spring weather, and they enjoy “working” with me in the garden. I recently bought them this cute Gardening Set from Heart & Hand with Magnolia from Target to help encourage their enthusiasm, and it is working.
I plan to create these eggs again with my children. However, this year I also wanted to do something a little different, and when I spotted these Liberty napkins I knew I had put them to good use. The end result is a chic, pretty, and inexpensive option to Easter egg decorating that I think you will enjoy making! Below I show you how to make your own chic Easter eggs using your favorite napkins (no drawing skills required)!
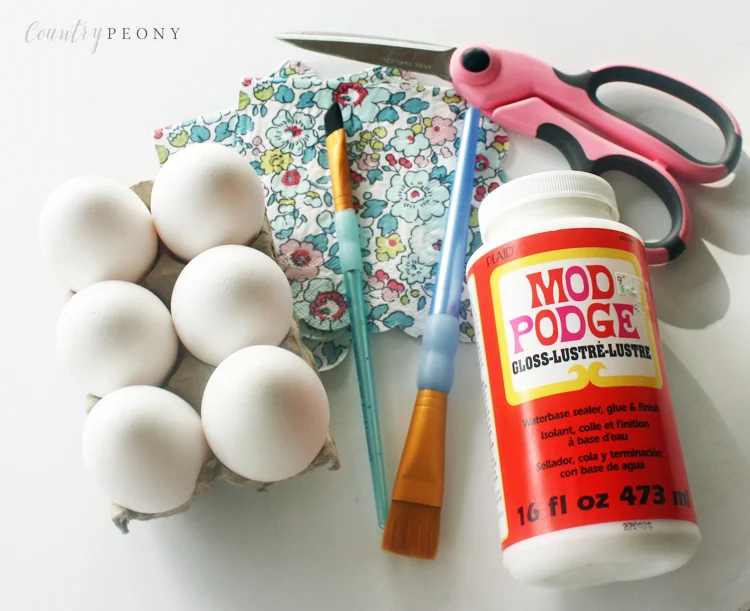
To make your own DIY Floral Easter Eggs, you will need:
Step 1: Boil the white jumbo eggs for 15-20 minutes. Then let them cool in cold water. After they are cool, dry them off completely.
*Since I am using hard boiled eggs this project will only be good for this Easter season. If you would like your eggs to last year after year, consider blowing out the egg so all of the yolk is out of the egg, or use large plastic white eggs.

Step 2: Cut out the small floral vignettes from your paper napkin. Don’t worry too much about cutting exact lines as the glue will help hide the raw edges onto the egg.
For 6 eggs, I only used 2 napkins.
*Ensure you cut small vignettes so that the paper florals lay and glue nicely onto the egg.


Step 3: One at a time (and very delicately) Mod Podge the floral cut outs onto the egg.
*The paper napkins are very delicate and so it is important to take your time when brushing on the Mod Podge.
*Place a wet and dry napkin nearby to help keep your hands clean. This process is very messy, and it is important to have clean and dry hands while you are applying the paper cut outs to your egg so the paper cutouts don’t stick to you.

Step 4: Apply an even, thin coat of Mod Podge over the floral cut outs and on to the egg. Ensure that all of the paper edges are laying flat onto the egg. Set aside to dry.

Step 5: Once the first coat of mod podge is dry, apply a second, thin layer of Mod Podge onto the egg. Set aside to dry.

This project was so fun that my three-year-old daughter got in on the act. She loved applying paper napkin strips and Mod Podge to her plastic eggs. Once her eggs were dry (and her hands were clean) we filled them with candy and had an Easter egg hunt with her and her older brother.

Step 6: Once the second coat of Mod Podge dries, you can add another layer of Mod Podge or you can choose to finish your project like I did. And voilà, you have some very chic and pretty Easter eggs perfect for an Easter brunch tablescape.

I really hope you enjoy making your own version of these floral Easter eggs with your favorite paper napkins.

What is your favorite way to decorate Easter eggs?
