DIY Vintage Inspired Glitter Ornament Wreath with Beacon Adhesives
*This post was created through a paid partnership with Beacon Adhesives. However, all opinions are honest and 100% my own.
*This post contains affiliate links. For more information, please see my disclosure page here.
The holidays are here, and I am so excited to share today’s DIY with you because it is a beautiful way to bring the Christmas cheer into your home. Today I am partnering with Beacon Adhesives to bring you a fun and festive holiday wreath: DIY Vintage Inspired Ornament Wreath.
Beacon Adhesives’ glue products are my go-to for all of my crafting needs whether it is for plastic, fabric, glass, metal, or wooden crafts. Today’s DIY wouldn’t be possible without two of Beacon’s products: Beacon’s Gitter-It! and Beacon’s Power-Tac.
Beacon’s Glitter-It! allows you to transform inexpensive and simple glass and plastic ornaments or any vessels into showstoppers as you will see below. And, Beacon’s Power-Tac is such a great product because it is permanent, low odor, and dries clear. Unlike other glues, Power-Tac does not contain PERC, which is a known carcinogen.
Like most of my DIYs this project is inexpensive, simple, and fully customizable to your color scheme. Beacon Adhesives’ glues allow you to safely create and craft as many projects as you can dream up all while having so much fun! The possibilities are endless, and I am so excited to continue to experiment with both of these glues.
Beacon Adhesives has graciously provided my readers with a coupon code. Please use code PEONY20 for 20% off ALL craft glues on Beacon Adhesive’s website. Limit one coupon per customer, per transaction. Not valid with any other coupons and orders over $300.00 and is valid until December 31st at 11:59 PM EST.
For your convenience, I have created a step-by-step video so you can see how I made the glitter ornaments and the wreath. Then continue below to follow the step-by-step images to make your own DIY Vintage Inspired Glitter Ornament Wreath.
Enjoy the video below to learn how to make your own glitter ornament wreath then follow along for the step-by-step tutorial to make your own Vintage Inspired Glitter Ornament Wreath to add some festive handmade charm to your Holiday décor this year!
Continue below for the step-by-step pictorial to make your own Vintage Inspired Glitter Ornament Wreath.
To make your own Vintage Inspired Glitter Ornament Wreath, you will need:
Create the Glitter Ornaments with Beacon’s Glitter-It!
Step 1: Prep your workspace and ornaments.
Place a piece of paper on the workspace to collect glitter.
Clean out the ornament ball with a mixture of water and vinegar. Let it dry completely.
Step 2: Remove the ornament cap, and set it aside.
Step 3: Insert Beacon’s Glitter-It! tip into the ornament ball, and squirt in about a quarter-size of glue.
Step 4: Swirl the ornament ball around until the glue covers the inside of the ornament ball.
Step 5: Remove the cap of the Glitter-It! container, then pour the excess glue back into the container.
Let the ornament sit for about 15 seconds.
Step 6: Pour about a quarter-size of glitter into the ornament ball.
Step 7: This is the fun part! Slowly rotate the ornament ball and watch as the glitter magically attaches to the inside of the ornament ball.
Make sure the glitter attaches to the entire inside of the ornament ball. Add more glitter if you need to.
Step 8: Reattach the ornament cap to the ornament ball, and enjoy your custom glitter ornament balls!
Step 9: Continue to make more glitter ornament balls in different colors and tones to add character and charm.
As a reminder, I used 22 ornament balls for my 14 inch wreath. However, you can add more for a fuller look, or less for a more simplistic look. It is completely up to you!
Create the Wreath with Beacon’s Power-Tac
Step 1: Apply a generous amount of Beacon Adhesives’ Power-Tac to the wreath frame.
If you do get the Power-Tac on your hands, clean it off with warm, soapy water.
Step 2: Attach one end of the tinsel garland to the glue on the wreath frame.
Step 3: Tightly wrap the tinsel garland around the wreath frame to create a pretty and practical base for the glitter ornaments. Ensure the garland is consistently touching as you wrap so that the wreath frame is fully covered.
On every fourth wrap, attach the garland with Beacon’s Power-Tac to the wreath frame for added stability.
Step 4: Continue to wrap the wreath frame with tinsel until you cover the entire wreath frame.
Step 5: To finish off the wreath base, apply Beacon’s Power-Tac to the wreath frame to secure the end of the garland to the wreath.
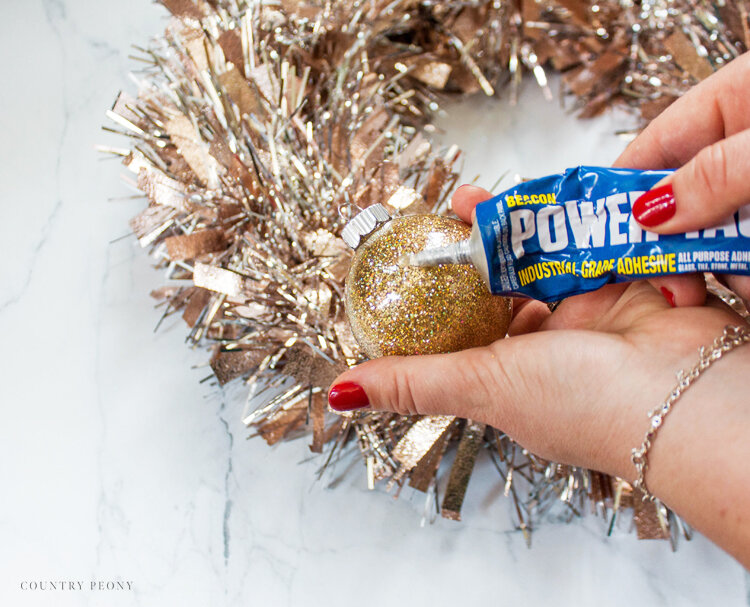
Step 6: Apply a generous amount of Beacon’s Power-Tac to the side and cap of the ornament then attach it to wreath.
Step 7: Hold the ornament in place for about 20-30 seconds until the ornament is secure with the glue.
Step 8: Continue to add the ornament balls to the wreath.
Step 9: Use Beacon’s Power-Tac to glue ornament balls together to for added stability.
Step 10: Glue ornament balls to the entire wreath.
Step 11: Enjoy your festive and vintage inspired wreath!
Thank you so much to Beacon Adhesives for the opportunity to make this very fun and festive wreath for my Christmas decor.
I believe crafting is more fun when we share our projects. Please email me at elizabeth@countrypeony.com, or please tag me @thecountrypeony or #countrypeony to show me your beautiful, custom creations!
Thank you so much for following along!


